How to copy a DVD on a Mac computer
It's really annoying that due to day-to-day use your favorite movie DVD is scratched by friends, children, or yourself. Why don't you make a copy of them? Then you could just use the backups and treasure up the original ones. When you want to backup a DVD with your Macintosh, you need a Mac DVD copy application. There are 3 steps of a general DVD Copy process:
1. Extracting the DVD to your computer (Reading)
2. Compressing the movie so it will fit on a DVD (Transcoding)
3. Burn the movie to a DVD (Burning)
4Media DVD Copy for Mac makes it easy to copy any DVD to a new disc, ISO file or DVD folder with high quality. You just need to insert the DVD you want to copy and 4Media DVD copy will lead you to finish the following process. You can also burn ISO file or DVD folder to DVD disc. The DVD copy Mac software can copy DVD-5 (4.7GB disc) to DVD-5, copy DVD-9 (Dual layer 8.5GB disc) to DVD-9 in 1:1 ratio and also compress DVD-9 to DVD-5. And here is the step-by-step guide to show you how to copy DVD to a new disc, DVD folder or ISO file and to burn DVD folder or ISO file to DVD. Surely, you should download, install and launch 4Media DVD copy for Mac firstly and make sure the DVD you want to copy (source DVD) and a new DVD disc (target DVD) are at hand.
How to copy a DVD on a Mac Computer
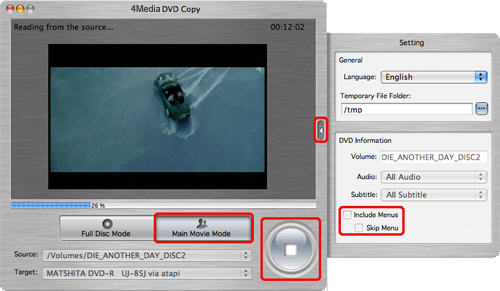
Step 1: After inserting the DVD you want to DVD backup into your Mac computer, click and choose to open DVD folder in the "Source" box to select your DVD disc.
Step 2: Click to select the DVD±ROM Drive in the "Target" box.
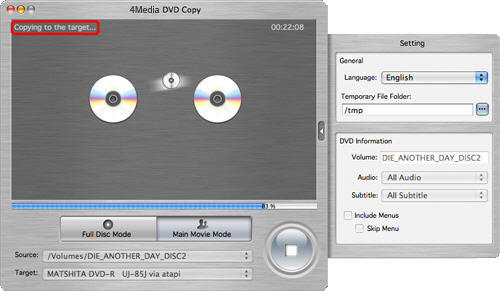
Step 3: Choose the DVD copy mode: If you want to copy main movie only, click "Main Movie Mode" button to get the main movie. Otherwise, select "Full Movie Mode" if you want to copy entire movie.
Click the triangle on the right of the interface to expand the "Setting" panel, and select the "Temporary File Folder" to save. It's just used to store the temporary files for DVD copy and will be cleared after DVD backup finished.
"Audio" and "Subtitle" mean that you can select all, none or part of them to copy into the target DVD.
If you want the DVD copy to contain DVD menu, check "Include Menu". Meanwhile, checking "Skip Menu" means that the player will skip menu when playing copied DVD.
Step 5: After finishing all these, click the large round button at the bottom right. Choose the type of the target disc (the new disc you prepared) in the "Size" dialog box that appears.
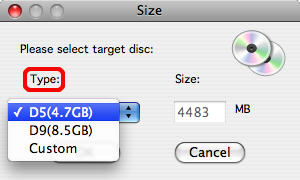
Click "OK", then the software starts the first process "Reading" and will copy the read content to temporary file folder.
Step 6: When the "Reading" process is done, the DVD-ROM ejects the source DVD automatically. Then the "Waiting for disc" dialog box appears, as shown below.
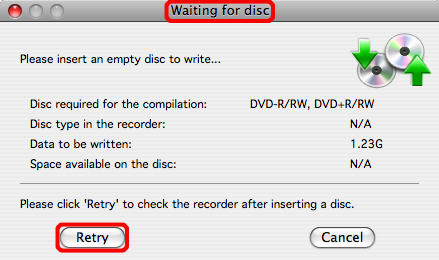
Insert an empty DVD disc, the target DVD disc, and click "Retry" to continue.
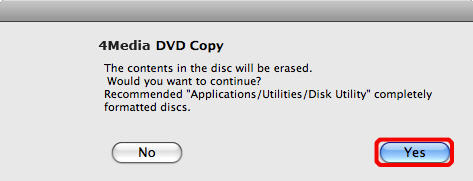
Tip: If the disc is not an empty one, it will remind you of erasing or not.
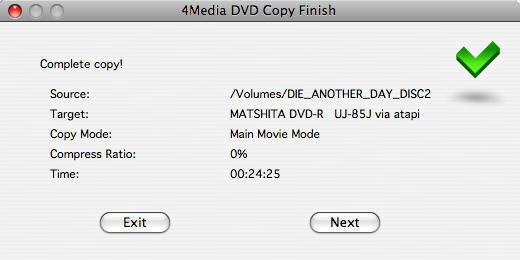
Step 7: After finishing all these, the software begins to copy.
After copying is over, the pop-up dialog box will remind you of exiting or copying another new disc.
The steps mentioned above are a whole DVD-to-DVD process. If there's no empty disc at hand, just change the target to save as DVD folder or ISO file on your Mac for access next time. That is DVD to DVD folder/ISO file process. And further more, you can burn a DVD folder or ISO file to a DVD disc if you want using 4Media DVD Copy for Mac effortlessly.

Featured Guides
Guides Categories
Video/Audio Guides
- 4Media Audio Converter Pro Tutorial
- 4Media Movie Editor 6 Tutorial
- Video Converter Ultimate Tutorial
- How to convert DAT to other videos
DVD/CD/Blu-Ray Guides
- 4Media Blu Ray Converter for Mac Tutorial
- How to convert Blu-ray disc to video files
- How to burn AVI, MPEG, VOB, DAT, M2V, MPG to DVD on Mac
- How to burn DivX to DVD on Mac
iPod Guides
- 4Media iPod Max Guide
- How to convert AVI, MPEG to iPod MP4 format
- Guide: 4Media iPod to PC Transfer
- How to convert DVD to iPod on Mac
iPhone Guides
- 4Media iPhone Contacts Transfer for Mac Tutorial
- 4Media iPhone Contacts Transfer Tutorial
- 4Media iPhone Ringtone Maker for Mac Tutorial
- 4Media iPhone Max Guide
iPad Guides
Youtube/Online Video Guides
- 4Media Online Video Converter for Mac Guide
- 4Media Online Video Downloader for Mac Guide
- 4Media Online Video Converter Guide
- 4Media Online Video Downloader Guide
PPT/PDF Guides
Others
Articles
- How to download YouTube videos for free
- How to download/convert YouTube videos to iPod
- How to download and convert YouTube videos
- All features of apple iPhone
- Now you can get more TV offerings from Apple iTunes
- Video Streamer HAVA from Snappy Multimedia
- iPod Growth Driving Demand for Flash Memory
- MediaMan HVX-3500 Review
- Uncertain whether new iPod will be delayed or not because of hurdles
- T3's top five iPod alternatives
- Envivio Exhibits MPEG-4 Solutions from Mobile to HD at CCBN2006